Circular Weaving
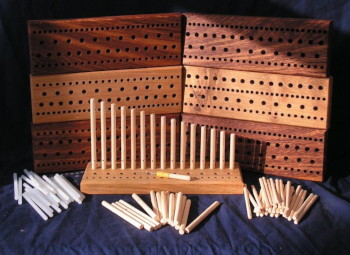
We provide a graduated set of 15 x 9mm pegs which is well suited for chunky yarn, wool tops or raw fleece. The narrower rows only take 6mm pegs of normal length. These shorter pegs are suited to lighter yarns and perhaps narrower projects. Mind you having said that wool tops can be easily divided into finer strands and will work on all peg settings. We recommend (link) Wooltops (another Yorkshire company) as the best supplier.
As with all peg loom weaving the first thing to do is to warp up the pegs. As we're weaving a circle each peg will have a longer warp than the preceding one. The central warp (with the shortest peg) will only be a few inches long whereas the outermost peg of 15 would have a warp length of about 66" or rather 132" total because it's doubled. That in itself can present an issue but we'll get around that in a minute.
Important note: You may find it easier to weave with the warp set behind the pegs rather than the front. Doing this means you're only pulling a short section of it through the weave with each lift. Trying to pull the warp around a semi circle or full circle is difficult. I know, I did that 1st time I wove one.
To begin I'd recommend only warping up about 5 pegs. This way you can quickly weave a test piece and become familiar with the technique. For warp lengths please see the Warping chart (<link) and follow instructions for printing off. Don't forget to add an extra 10"+ for tying off.
When starting off a weave I find it's actually best to tie on to or simply start from the the righthand peg. Weave up to and round the shortest peg then back to the start peg. Weave up the row again but to the 2nd peg and back etc reducing the peg count every time.
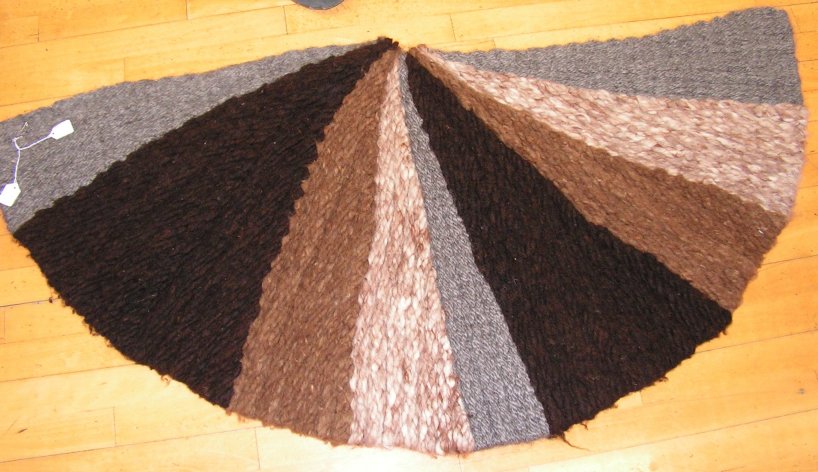
While there is only 1 round the short peg there are now 15 round the longest peg. You have created the 1st segment. All pegs should now be lifted and reset. Carry on creating segments till you think you have enough. The woven segments will tell you, but add one more to bulk it up a bit.
Note the first few segments are pretty easy to move around the warp. Eventually this will get more difficult and you may prefer to pull the warp right through and set it behind the pegs. Whichever is easiest for you.
| Circular weaving Warp length chart | ||||||||||||||
| ¾" Peg spacing | 1" Peg spacing | |||||||||||||
| Circle | Warp | Circle | Warp | |||||||||||
| diameter | length in " | diameter | length in " | |||||||||||
| Peg 1 | Small | single | double | single | double | |||||||||
| Peg 2 | 1.5 | 4.7 | 9.4 | 2 | 6.3 | 12.6 | ||||||||
| Peg 3 | 3 | 9.4 | 18.8 | 4 | 12.6 | 25.1 | ||||||||
| Peg 4 | 4.5 | 14.1 | 28.3 | 6 | 18.8 | 37.7 | ||||||||
| Peg 5 | 6 | 18.8 | 37.7 | 8 | 25.1 | 50.2 | ||||||||
| Peg 6 | 7.5 | 23.6 | 47.1 | 10 | 31.4 | 62.8 | ||||||||
| Peg 7 | 9 | 28.3 | 56.5 | 12 | 37.7 | 75.4 | ||||||||
| Peg 8 | 10.5 | 33.0 | 65.9 | 14 | 44.0 | 87.9 | ||||||||
| Peg 9 | 12 | 37.7 | 75.4 | 16 | 50.2 | 100.5 | ||||||||
| Peg 10 | 13.5 | 42.4 | 84.8 | 18 | 56.5 | 113.0 | ||||||||
| Peg 11 | 15 | 47.1 | 94.2 | 20 | 62.8 | 125.6 | ||||||||
| Peg 12 | 16.5 | 51.8 | 103.6 | 22 | 69.1 | 138.2 | ||||||||
| Peg 13 | 18 | 56.5 | 113.0 | 24 | 75.4 | 150.7 | ||||||||
| Peg 14 | 19.5 | 61.2 | 122.5 | 26 | 81.6 | 163.3 | ||||||||
| Peg 15 | Largest | 21 | 65.9 | 131.9 | 28 | 87.9 | 175.8 | |||||||
| The "single warp" figure above is the actual circumference of the circle. | ||||||||||||||
| A warp is always a double strand. | ||||||||||||||
| Add sufficient extra length to each warp to allow for knot tying at each end. Usually 10-20% of warp length. | ||||||||||||||


Circular weaving on a peg loom is the one way you can create something which will be larger than the loom itself.

See how the segments of an Orange form a circle. This is how the weave will come together, a segment at a time.
